How To Safely Test Electrical Wires: A Beginner's Guide
Hey there, friend. Listen up, because this is important. If you're dipping your toes into the world of electrical work—whether it's to fix a pesky issue at home or maybe even tackle a full-on project—knowing how to test electrical wires is like having a secret weapon in your toolkit. It's not just about being safe; it's about being smart and avoiding potential disasters. Picture this: you're fiddling with wires, thinking you're all set, but suddenly—bam! You’ve got a short circuit. Not exactly the outcome you were hoping for, right? That's why we're here. This guide is your ultimate resource for mastering the ins and outs of testing electrical wires. Whether you're just starting out or simply need a refresher, you’re in the right spot.
Now, before we dive headfirst into the details, let's take a moment to talk about why this matters so much. Testing electrical wires isn't just for the pros. As a homeowner or someone who wants to save a little cash, knowing how to do this safely can prevent accidents and save you from those costly repairs. Think of it like wearing a seatbelt—it might feel unnecessary until something goes wrong. And trust me, when it comes to electricity, things can spiral out of control in the blink of an eye if you're not careful. So let's keep it real: this is serious stuff, and it deserves your attention.
Alrighty, let's set the stage. This guide is packed with everything you need to know. We'll cover the basics of electrical safety, the tools you'll need, and step-by-step instructions to walk you through the process. So grab your favorite drink, sit back, and let’s jump into this electrifying journey. Don’t worry—we’ll keep things simple and straightforward. No fancy jargon, just practical advice that you can use right away. Ready? Let's get started!
Read also:Is The Pioneer Woman Truly Unwell Unraveling The Speculation Around Ree Drummonds Health
Why Testing Electrical Wires is a Must
Here's the deal, folks. Your home's electrical system is kind of like its nervous system. It keeps everything humming along smoothly, from your lights to your appliances. But when something goes wrong, it can escalate fast. That's why learning how to test electrical wires is so critical. Think about it: a faulty wire can lead to power outages, fires, or even worse, electrical shocks. Not exactly the kind of surprises you want in life, right? Regularly testing your wires helps you catch potential problems before they turn into full-blown disasters.
According to the National Fire Protection Association (NFPA), electrical failures or malfunctions were factors in an estimated 46,000 home structure fires in 2020 alone. That's a lot of damage, folks. By learning how to test wires properly, you're not just protecting your home—you're protecting your family and your wallet. It’s a win-win situation. So let’s face it: when it comes to your home's electrical system, knowledge is power. Literally.
Common Electrical Hazards to Watch For
- Exposed or frayed wires
- Overloaded circuits
- Improper grounding
- Wires with damaged insulation
- Loose connections
These hazards might seem small at first glance, but trust me, they can lead to big problems if you don’t address them. Testing your wires regularly is like giving your home a check-up. It’s preventative maintenance that can save you a ton of headaches down the road. So don’t skip this step—it’s worth the effort.
Your Essential Toolkit for Testing Electrical Wires
Before you dive into testing electrical wires, you’ll need the right tools. Think of these as your trusty sidekicks. Having the right gear not only makes the job easier but also keeps you safe. Here’s what you’ll need:
Must-Have Tools for Electrical Testing
- Multimeter: This is your go-to tool for measuring voltage, current, and resistance. It’s like a Swiss Army knife for electrical work.
- Non-Contact Voltage Tester: This handy tool lets you detect voltage without touching the wires. Super safe and super convenient.
- Wire Strippers: You’ll need these to strip the insulation off wires when necessary. Precision is key here.
- Insulated Screwdrivers: These are designed to prevent electrical shocks. Always use insulated tools when working with live circuits.
- Gloves and Safety Glasses: Safety first, always. Gloves protect your hands from shocks, and safety glasses keep debris out of your eyes.
Having these tools on hand will make your job much easier and safer. Trust me, you don’t want to cut corners here. Safety should always be your top priority. When it comes to electricity, being prepared is the name of the game.
A Step-by-Step Guide to Testing Electrical Wires
Alright, let’s get into the nitty-gritty. Here’s a step-by-step guide on how to test electrical wires. Follow these instructions carefully, and you’ll be testing like a pro in no time.
Read also:Unveiling The Truth Joe Scarboroughs Health Amidst Media Speculation
Step 1: Turn Off the Power
Rule number one: always turn off the power before you start testing. Head to your circuit breaker and switch off the appropriate breaker. Use a non-contact voltage tester to double-check that the power is indeed off. Better safe than sorry, right? You don’t want to take any chances with live circuits.
Step 2: Inspect the Wires
Take a good, hard look at the wires you’re working with. Check for any signs of damage, like fraying or exposed copper. If you spot anything suspicious, mark it for repair or replacement. This step is crucial for identifying potential hazards. Don’t skip it—it could save you a lot of trouble down the road.
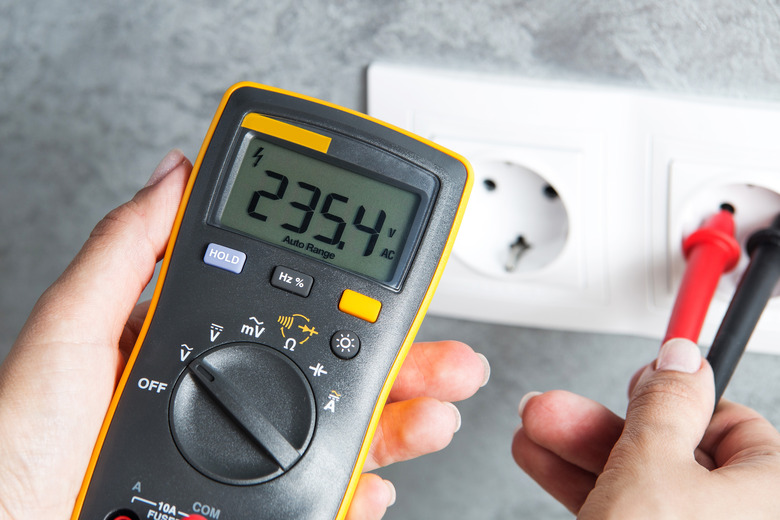
Step 3: Use a Multimeter
Now it’s time to break out the multimeter. Set it to the correct setting (usually volts AC) and touch the probes to the wires. If you get a reading, it means there’s still power running through the wires. If not, you’re good to proceed. Simple, right?
Step 4: Check for Continuity
Continuity testing is important for ensuring that the circuit is complete. Set your multimeter to the continuity setting and touch the probes to the ends of the wire. If you hear a beep, the circuit is good. If not, there might be a break in the wire. This step helps you confirm that everything is connected properly.
Step 5: Test Grounding
Proper grounding is essential for safety. Use your multimeter to test the grounding by touching one probe to the ground wire and the other to the neutral wire. You should get a reading of around 120 volts. If not, there might be an issue with your grounding system. Grounding is what keeps you safe, so don’t overlook this step.
And there you have it! These steps will help you test electrical wires safely and effectively. Remember, take your time and don’t rush the process. Safety is always the priority.
The Basics of Electrical Safety
Before you dive into testing electrical wires, it’s important to understand the basics of electrical safety. This isn’t just about knowing what to do—it’s about knowing what NOT to do. Here are a few key tips to keep in mind:
Electrical Safety Tips
- Always assume wires are live until proven otherwise.
- Never work on electrical systems when they’re wet.
- Use insulated tools and wear protective gear at all times.
- Double-check your work to ensure everything is secure.
- If you’re unsure about anything, call in a professional.
These tips might seem basic, but they can save your life. Electricity is powerful stuff, and it demands respect. Treat it with care, and it’ll treat you right. Remember, it’s better to be safe than sorry.
Common Mistakes to Avoid
Even the best of us make mistakes sometimes. When it comes to testing electrical wires, avoiding common pitfalls can save you a lot of trouble. Here are a few mistakes to watch out for:
Mistakes to Avoid
- Skipping the power-off step
- Using damaged or improper tools
- Not wearing protective gear
- Ignoring warning signs
- Trying to fix something you’re unsure about
By avoiding these mistakes, you’ll be well on your way to becoming an electrical testing pro. Remember, it’s better to take a little extra time to do things right than to rush and risk an accident. When it comes to electricity, patience is your best friend.
Advanced Techniques for Testing Electrical Wires
Once you’ve mastered the basics, you might want to explore some advanced techniques for testing electrical wires. These methods can give you a deeper understanding of your electrical system and help you identify more complex issues.
Advanced Testing Methods
- Thermal Imaging: This technology allows you to detect heat patterns in wires, which can indicate potential issues like overheating.
- Insulation Resistance Testing: This test measures the integrity of the wire’s insulation, helping you identify weak spots before they become problems.
- Circuit Tracing: This technique helps you locate specific circuits in complex electrical systems, making troubleshooting easier.
These advanced techniques might seem intimidating at first, but with a little practice, they can become valuable tools in your arsenal. They’re especially useful if you’re dealing with more complicated electrical systems. So don’t be afraid to dive deeper and expand your knowledge.
Troubleshooting Common Electrical Issues
Let’s face it—things don’t always go as planned. If you run into issues while testing electrical wires, don’t panic. Here are some common problems and how to fix them:
Common Electrical Problems and Solutions
- No Voltage Reading: Double-check that the power is turned on and that your multimeter is functioning properly.
- Broken Continuity: Inspect the wire for breaks or damage and repair as needed.
- Improper Grounding: Ensure that the ground wire is properly connected and secure.
By troubleshooting these common issues, you’ll be able to tackle most problems that come your way. And if you’re ever in doubt, don’t hesitate to call in a professional. Better safe than sorry, right?
Final Thoughts
Well, there you have it, folks. A comprehensive guide on how to test electrical wires for beginners. From understanding the basics to mastering advanced techniques, you now have all the tools and knowledge you need to tackle electrical testing with confidence. Remember, safety should always be your top priority. Take your time, use the right tools, and don’t be afraid to ask for help if you need it.
Now it’s your turn. Have you tried testing electrical wires before? What challenges did you face? Share your experiences in the comments below. And if you found this guide helpful, don’t forget to share it with your friends and family. Knowledge is power, and sharing it makes us all safer. Until next time, stay safe and stay electrified!
Table of Contents
- Why Testing Electrical Wires Matters
- Common Electrical Hazards to Watch Out For
- Tools You Need to Test Electrical Wires
- Must-Have Tools for Electrical Testing
- Step-by-Step Guide to Testing Electrical Wires
- Step 1: Turn Off the Power
- Step 2: Inspect the Wires
- Step 3: Use a Multimeter
- Step 4: Check for Continuity
- Step 5: Test Grounding
- Understanding Electrical Safety Basics
- Electrical Safety Tips
- Common Mistakes to Avoid


